The administration of the dental practice: clients, suppliers, employees, payments, first notice and cash flow.
Now let`s proceed with the analysis of the other configurations in relation to the management of ADMINISTRATION.
DENTAL OPERA offers the possibility to manage not only the clients defined as patients, but the whole clientele including customers which don`t classify as patients. Moreover, it is possible to enter suppliers and employees.
How do you continue with the insertion of client data, suppliers and employees, in order to subsequently register the respective tasks in terms of management?
1 ENTER CLIENT
In the left curtain click: ADMINISTRATION – CLIENTS, a tab will open on which new names can be inserted. Push the green button +ENTER.
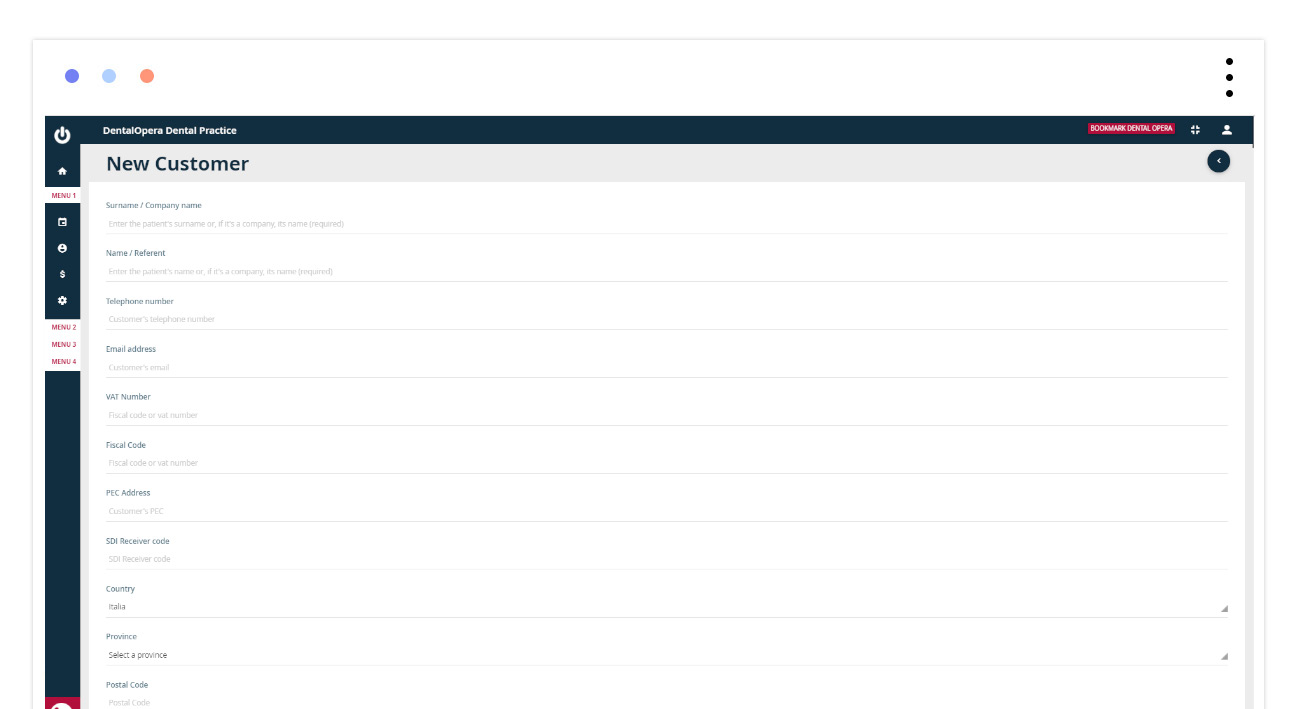
On the screen opening up, continue with the insertion of the new client and the rest of the requested data. Click on SAVE. The management software is very straightforward and the process of insertion and the modification of data is similar for each procedure.
2 ENTER SUPPLIERS
Now let`s switch to the management of suppliers, an important section to provide a clear panoramic over the different collaborators of your practice.
Click on ADMINISTRATION – SUPPLIERS, in the left curtain. A tab will open up from which new names can be entered, thus, click on the green button +ENTER.
Continue by inserting suppliers with the respective data, which will be useful subsequently (f.e. for invoicing).
Never forget to SAVE.

To complete with further information select the tab SUPPLIERS and click on the PEN ICON right next to the name. On the screen opening up, you can insert additional data to conclude cataloging. At the end, click on SAVE.
3 ENTER EMPLOYEES
Let`s move to the management of employees, a section useful to get a clear overview on who is working in the dental practice (all employees, also the ones not being DOCTORS).
Click on ADMINISTRATION – EMPLOYEES in the curtain on the left. A tab will open up from which new names can be inserted. Therefore, click on the green button “+”.

On the screen opening up, continue by inserting employees with the respective data and don`t forget to SAVE. An additional tab will open helping you to insert additional data.
Now let`s discuss the administrative accountability partitioned between FIRST NOTICE and CASH FLOW. Click on ADMINISTRATION – FIRST NOTICE in the curtain on the left.
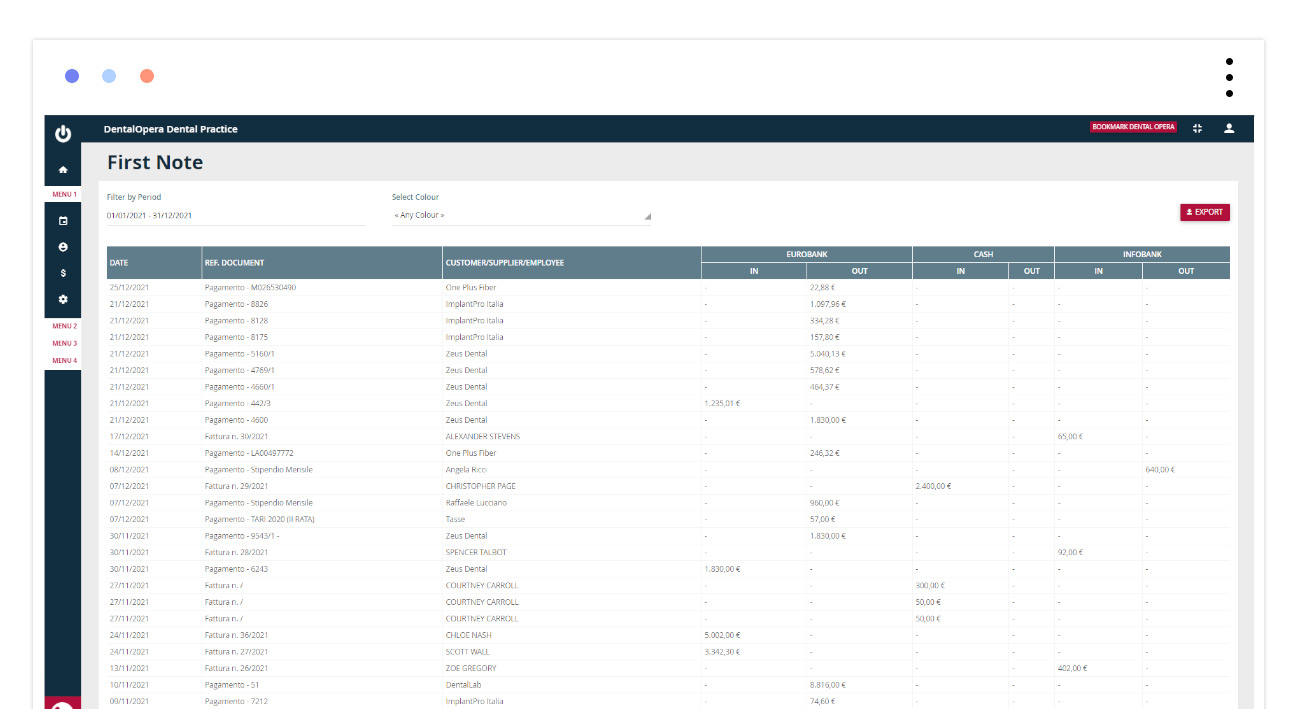
FIRST NOTICE represents the section which functions as the register of entrances and expenditures. Selectable by filtering per period or color. Download the first notice document by clicking on the button on the upper right +DOWNLOAD, an XLS will form which you can later print. This is going to be comfortable concerning the report to your accountant or for the paper-based filing of your data.
In order to have a clear management concerning the expenses of your practice, the management software DentalOpera provides the section CASH FLOW. This section offers a transparent overview on how and when your practice`s money is spent.
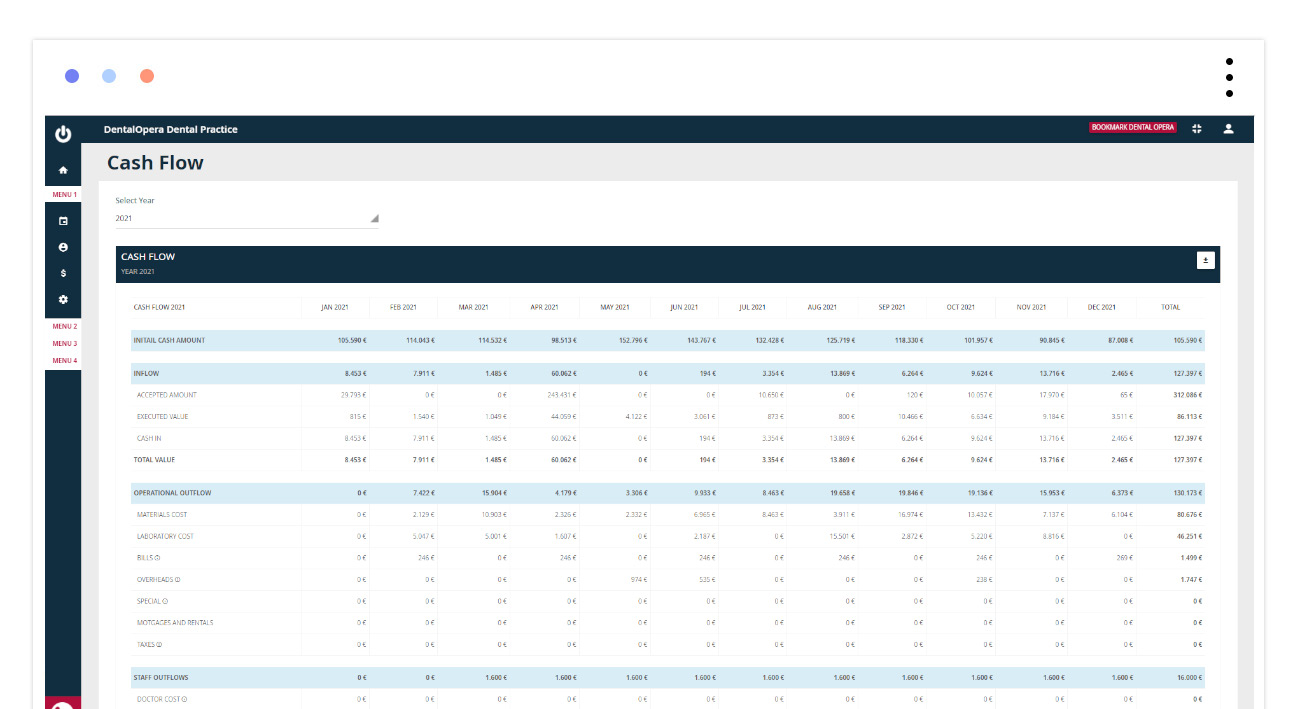
Filter the CASH FLOW per period or color and if you desire view the daily, monthly and yearly details. Like the FIRST NOTICE, it is possible to download the CASH FLOW document by clicking on the upper right button ⇓, a XLS file is going to develop which you will be able to subsequently print.
HOW TO NOTIFY PAYMENTS?
Thanks to the DENTAL PRACTICE MANAGEMENT SOFTWARE DENTAL OPERA, it is possible to capture and notify payments, salaries and fees of operators/DOCTORS. These three categories are different by concept, but very similar given that they all represent an expenditure of the cash box of your dental practice.
By choosing the item ADMINISTRATION – PAYMENTS, it is possible to view the already noted payments and salaries and to signal new ones. This can be useful for possible payments to suppliers.
To add a new payment, just click on the green button “+” (top right). A tab will open, where all the requested areas have to be completed. By using the button REGISTER PAYMENT at the end, everything is going to be entered into the list.
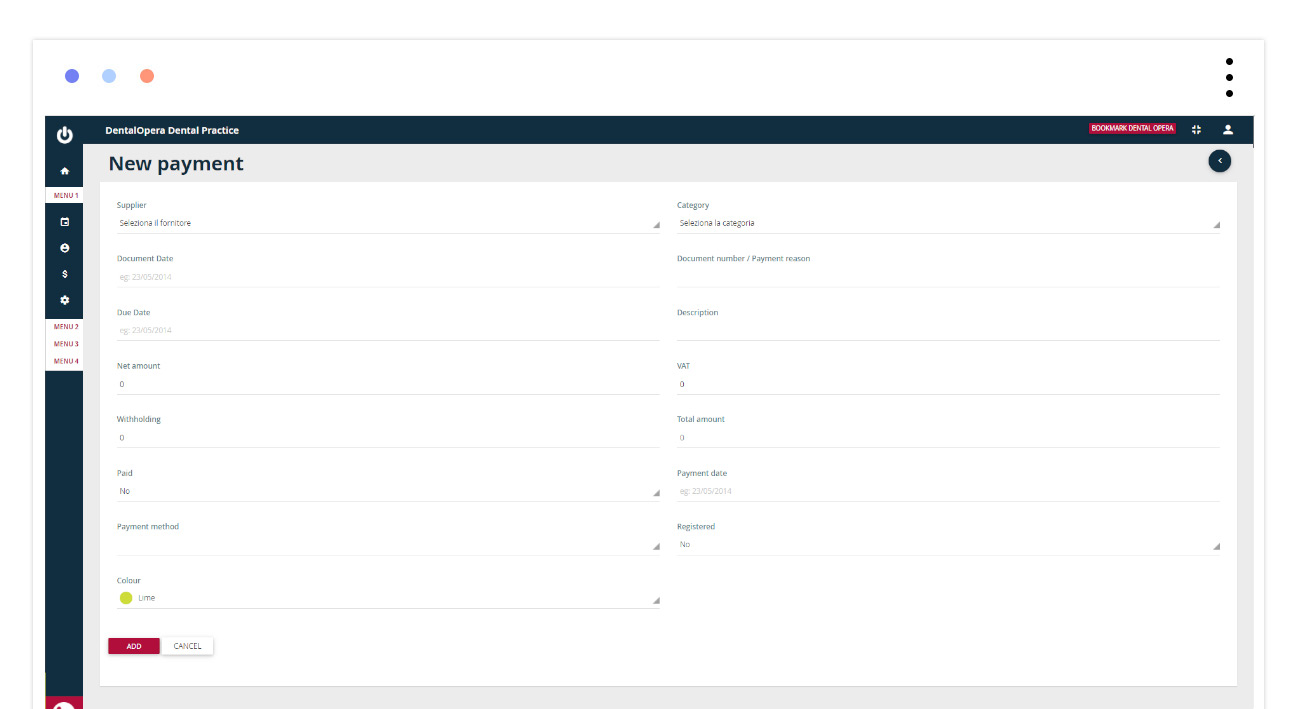
By choosing the item ADMINISTRATION – SALARIES it is possible to view the already registered paid salaries (employees) and signal new ones. To add a new salary just click on the green button “+” on the upper right, a tab will open, where all the requested areas have to be completed. By using the button REGISTER PAYMENT at the end, everything is going to be entered into the list.
Find the section DOCTORS FEE, below the item ADMINISTRATION, on the menu.
This section signals, every time a PROCEDURE executed by a DOCTOR is paid.
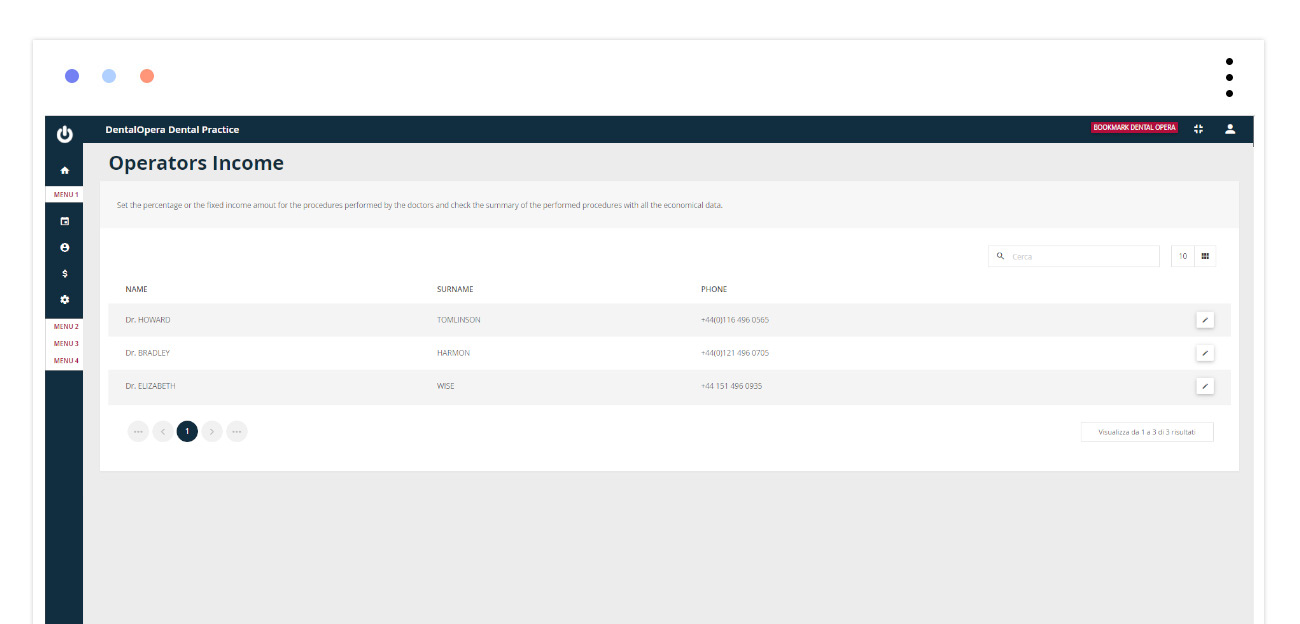
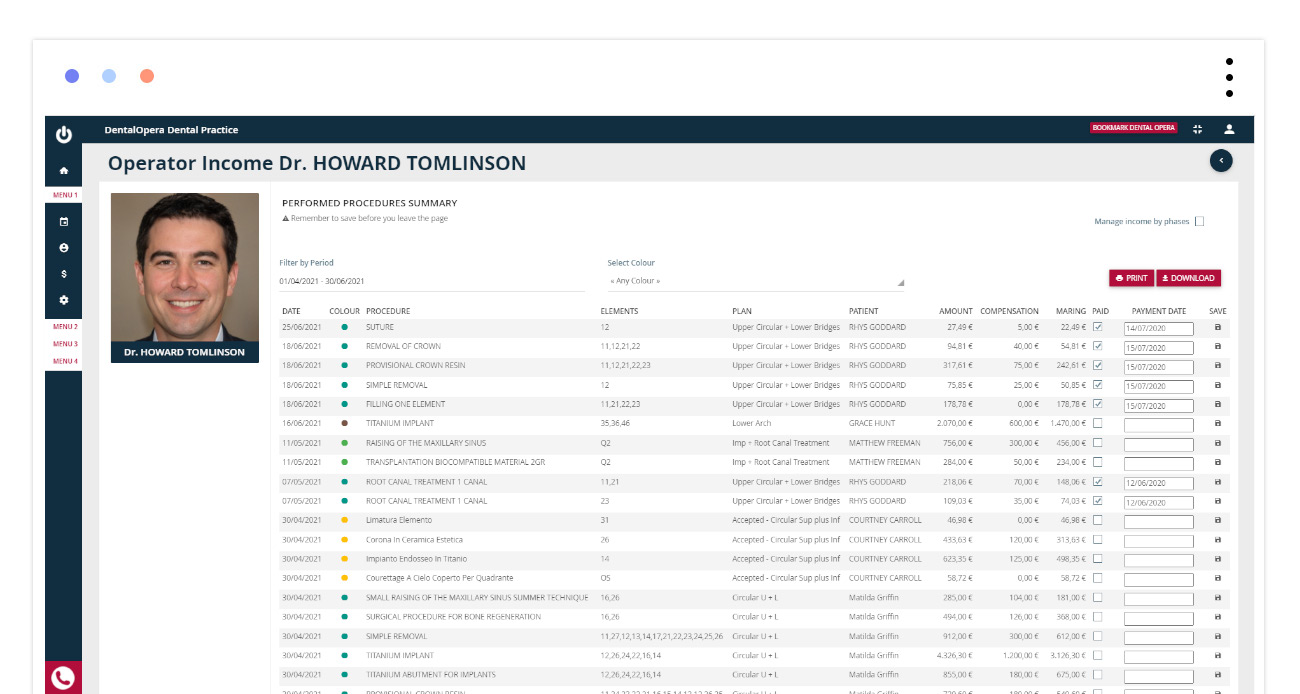
Choose a DOCTOR on which to register a fee. Click on the PEN ICON and a page will be loaded. This page contains all the PROCEDURES executed by the respective DOCTOR. Various details are going to be visible with the cost and the compensation of the specific PROCEDURE standing out. By clicking on the square PAID, it is going to be entered into the column next to the “payment date”;- equivalent to the current day (can be modified manually). In conclusion, click on the button SAVE found next to every date.
