How to assign an appointment
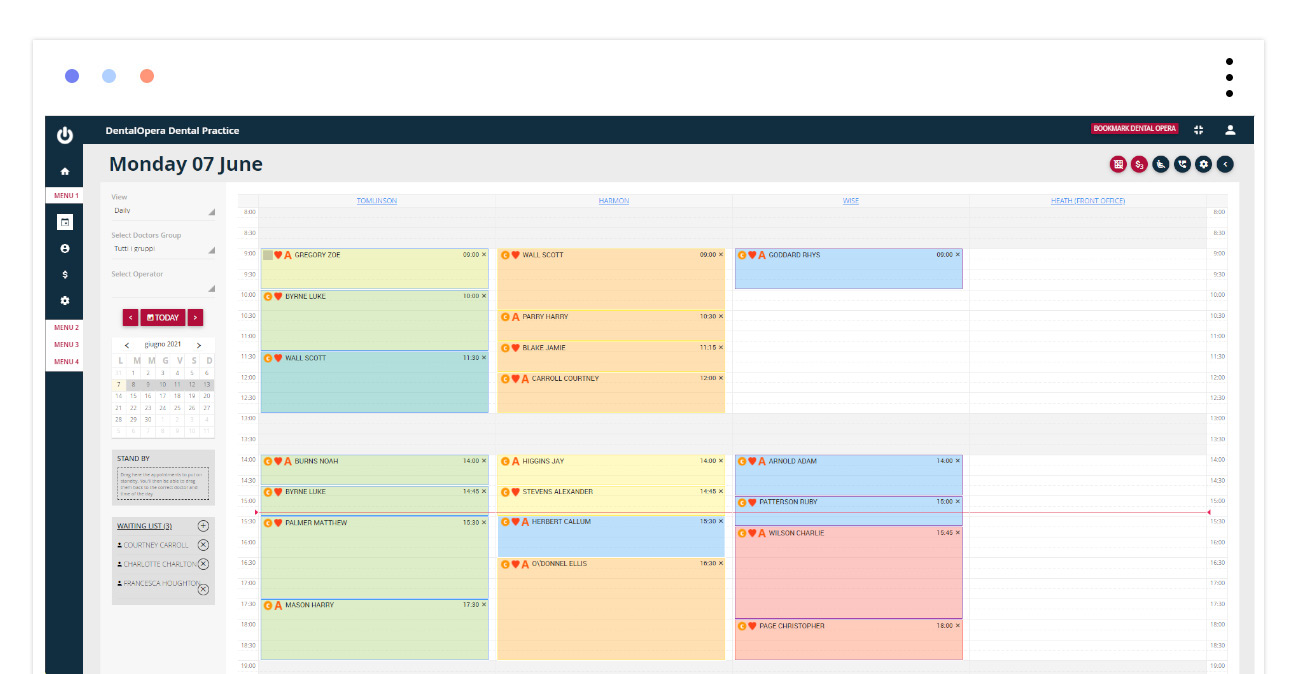
If you want to assign an appointment in the DENTAL PRACTICE SOFTWARE DENTAL OPERA, first it is necessary to select the item agenda in the sidebar menu.
Carefully select the column correspondent to the DOCTOR. Press starting HOUR of the appointment, keep pressed, and drag the mouse downwards to select and define the DURATION.
A blue block is going to form (visible in the picture below).

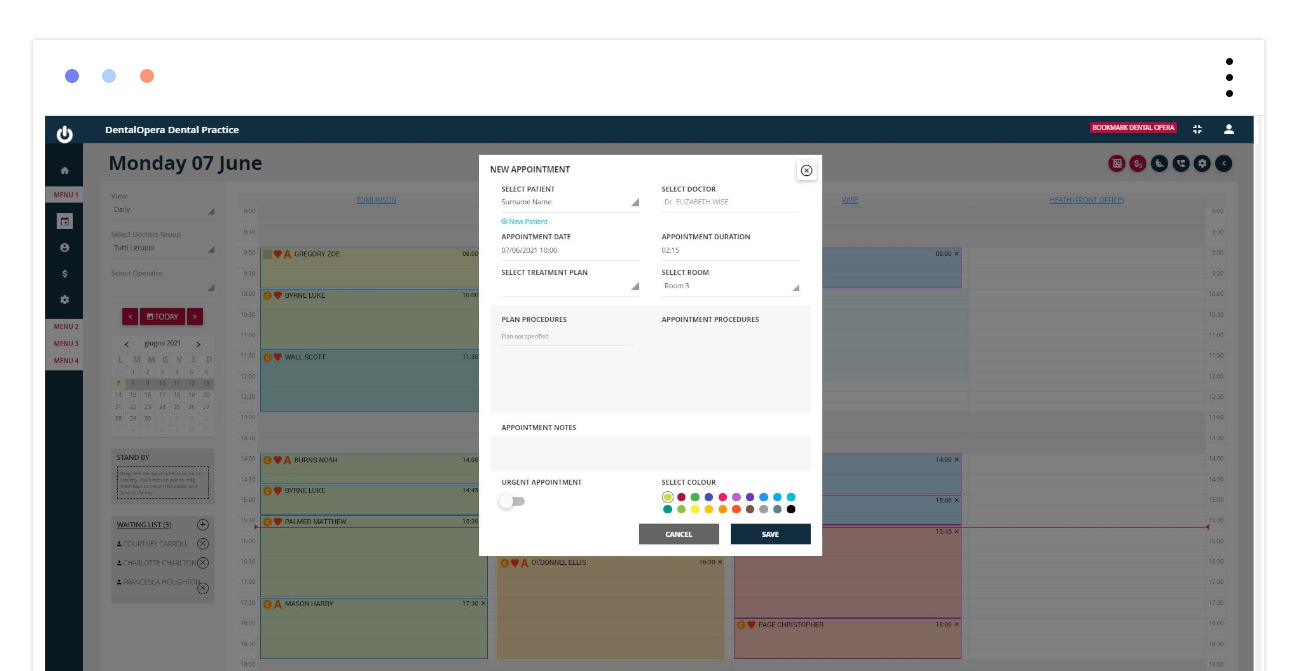
By releasing the left key of the mouse the window NEW APPOINTMENT is going to open up. Initially we have one section.
APPOINTMENT DETAILS
Select the name of the patient, if already registered, or simply enter a new patient with little, rapid information and implement it. Select or recheck date, hour, duration and DOCTOR.

An important function of the electronical dental agenda is the possibility to select an already created dental treatment plan and to choose which dental PROCEDURE has to be scheduled. The list PROCEDURES OF THE EXECUTED PLAN and TO EXECUTE is going to appear below. Just click on the “>|“ and the PROCEDURE will automatically move in the column APPOINTMENT PROCEDURES.
In relation to a new treatment use the selection of fast PROCEDURES. This is a brief list of dental PROCEDURES frequently recurring;- f.e. simple extraction, dental hygiene, fillings, whitening, etcetera. By clicking on one of the items it moves into APPOINTMENT PROCEDURES and a new treatment plan defined as Quick, anticipating the following work, is automatically created. This way every appointment is always going to be linked to a dental treatment plan.
APPOINTMENT NOTES: comfortably enter notes to the appointment.
URGENT APPOINTMENT: by clicking on the button ON-OFF it turns green and activates the “URGENCY” function. The selected appointment, is going to be showcased with a red blinking frame in the dental agenda and, therefore, will be easily identifiable. Deactivate the urgency by pressing the button again.
COLOR SELECTION: Find a vast selection of colors, designed to define the type of appointment. The color is going to be set automatically, based on the assigned color to the PROCEDURE in the section CATEGORIES of the PRICE LIST. In case of different PROCEDURES the PROCEDURE with the highest economic value is going to lead. At the end, click on SAVE.
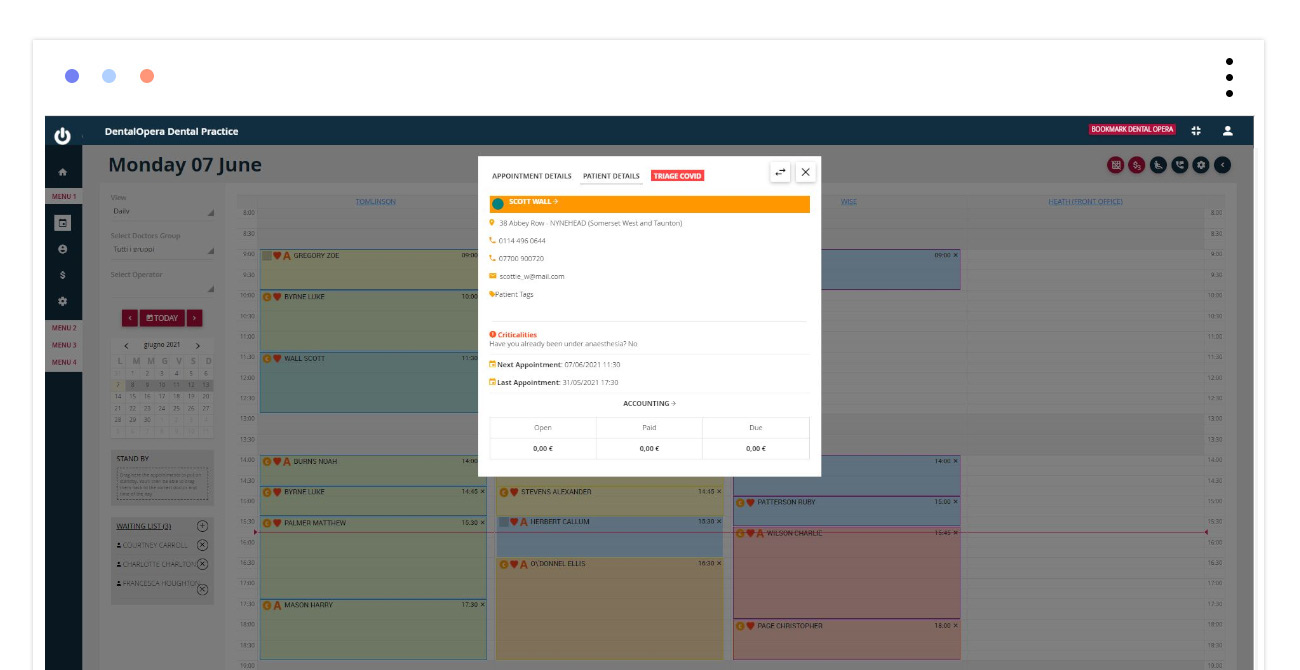
By clicking on an already registered appointment again, a section is going to add to the agenda.
PATIENT DETAILS
A fast view over the patient data:
- SURNAME and NAME of the patient
- ADDRESS
- PHONE NUMBER
- ANAMNESIS
- NEXT and LAST APPOINTMENT

ACCOUNTING STATEMENT: This section contains a general view on the economic situation, needed in order to manage the administration of a dental practice. It will appear green If the patient is alright with payments, orange if the revenue is bigger than the preset limit and red if the patient is behind with payments.
The value of the credit limit has to be setup under SETTINGS – CUSTOMIZATION – NOTIFICATION ON THE PERCENTAGE OF OPEN PAYMENTS. The credit limit presents an internal information of the dental practice, namely, it doesn`t appear in any communication to the client. For major detail, it is recommended to look up the article “How to setup the notification on the percentage of open payments”.
TIME LINE: another innovation offered by the DENTAL SOFTWARE DENTAL OPERA. This timeline indicates the work progress of a dental treatment plan. It represents an important indicator, especially in relation to the accounting statement. If, for example, you have a red accounting statement and a timeline at 90% you can consider to request the payments, as for the patient is close to the end of his treatment.
The rapid visualization, allows to access the sections of personal patient data management, accountancy of the dental practice and dental treatment plan. Just click on one of the different links presented in the window.


