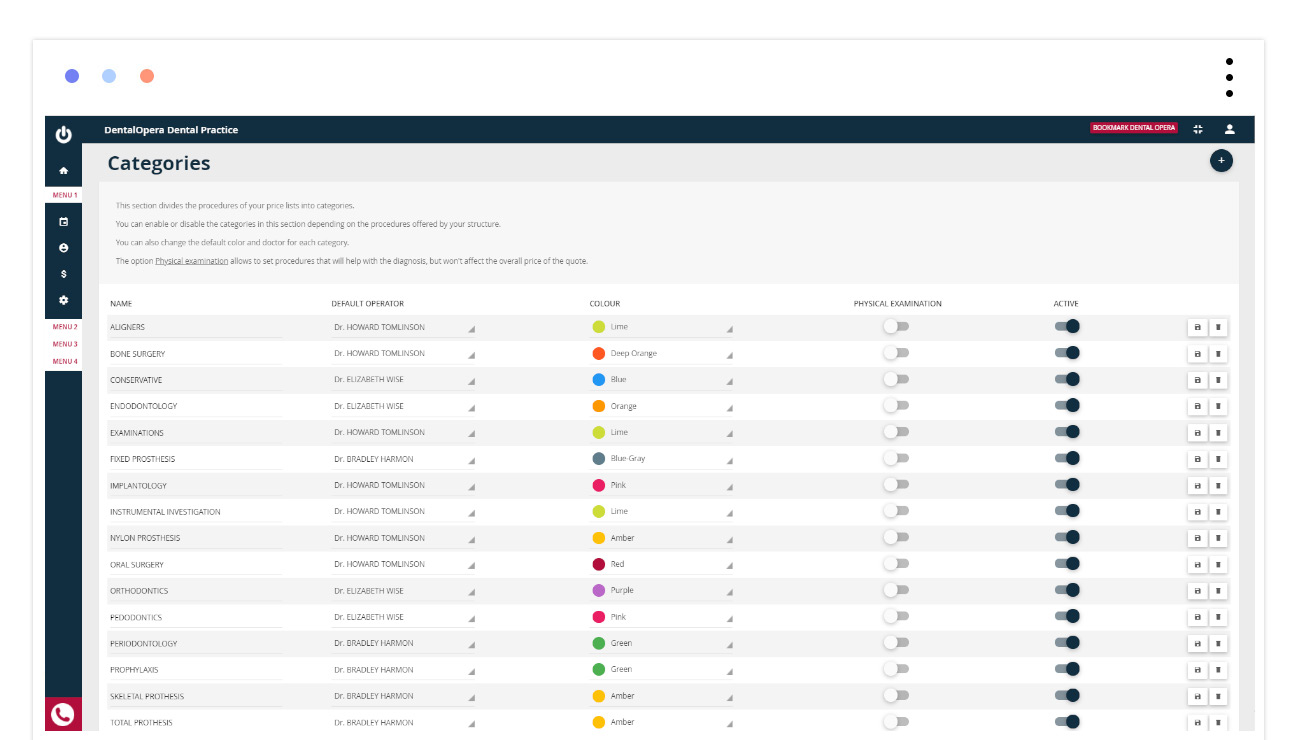
How to setup dentistry categories
Setting this up will prove to be truly easy!
Click on the item SETTINGS – PRICE LIST– CATEGORIES in the drop-down menu on the side.
The section DENTISTRY CATEGORIES is going to open up, allowing you to split the PROCEDURES of your PRICE LIST in the main categories of treatment.
If you care to perform some modification on an already existing category, you will be able to modify the name, the predetermined operator, the color (which will be automatically setup in your timetable) and by using the ON-OFF buttons, setup the areas objective analysis and active (if the category is actually functional). At the end, click on the ICON SAVE.
To insert a new category just press the button “+” on the upper side of the screen. The software is going to request a name for the category, a color to add (for example red in connection to surgery, green in connection to first visit, etc) and an accountable DOCTOR (the doctor that mainly performs the PROCEDURES of a given category). In conclusion, click on the green button SAVE.


