How to setup the timetable: days & hours & working units
The dental practice software DENTAL OPERA was developed to facilitate the management of a dental practice. One of its crucial features is represented by the possibility to setup a timetable according to your requirements.
Let us start by ensuring the possibility to setup days and hours.
Open up the item TIMETABLE in your drop-down menu, found on the left of your screen. On the upper right you find a green button with a GEARWHEEL icon. By clicking on it, you can access the tab TIMETABLE SETTINGS.

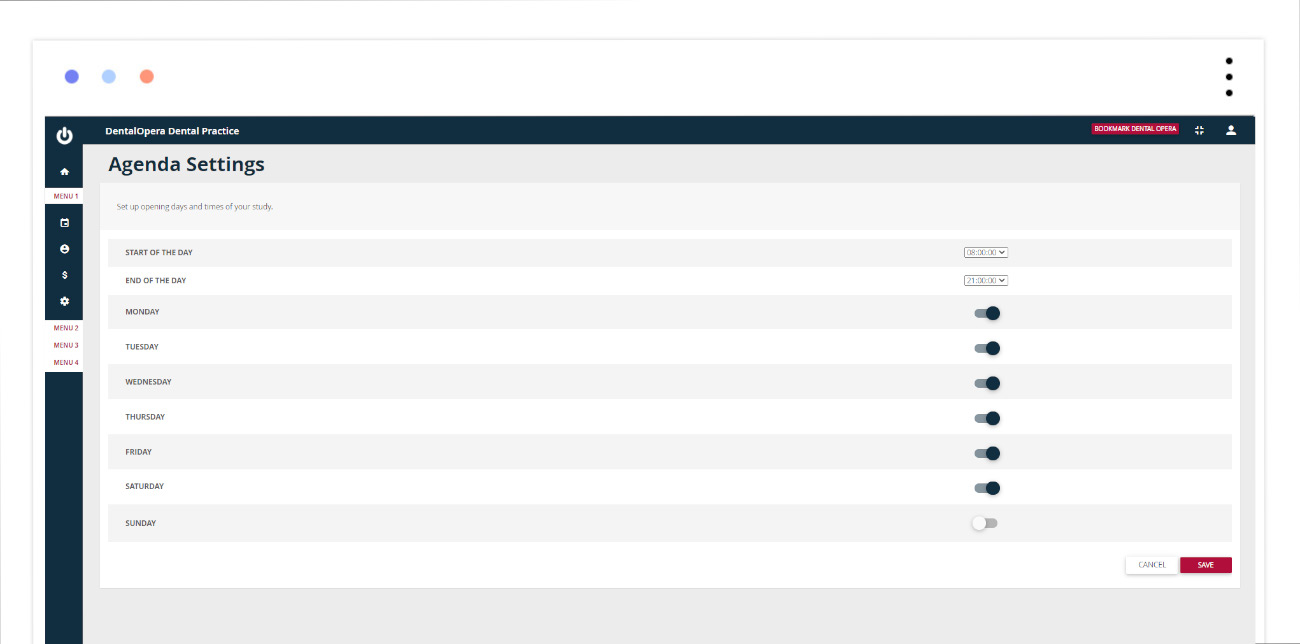
You can setup the opening hours of your dental practice by clicking on the items START OF THE DAY and END OF THE DAY, located in the side menu of the screen that opens up. Following this process, you have narrowed down the hours on your timetable by incorporating an exact period of time. In the next step, you can point out the opening days of your practice by using the ON-OFF button, found on the side of the week-days. Whenever they change their color to green, they will appear in the timetable and the color is going to imply the opening days of your practice. Save everything, by clicking on the button SAVE on the bottom right of the screen.
Now let`s talk about the working units.
These groups can be used as a filter in your timetable, by assigning different DOCTORS to each unit. Following this process, initially, there is not going to appear just one DOCTOR, namely the timetable of a single doctor, instead, all the working days of all the DOCTORS are going to be showcased. So, for example, the working units enable you to visualize the doctors working the hygiene sector, the implantology, the prosthetics sector and many more.. by being previously partitioned.
Let`s try to enter a new working unit.
Open the item TIMETABLE in the drop-down menu on the left.
On the upper right a green button, with an icon showing TWO PEOPLE, is going to appear. By pressing it, you are able to access the tab WORKING UNITS.

Click on the button +UNIT on the screen that pops up. This click makes it possible to enter a new unit. Just enter the name and save it by pushing the SAVE button below.
To remove an entire working unit, click on the TRASH icon located on the right of the chosen unit.

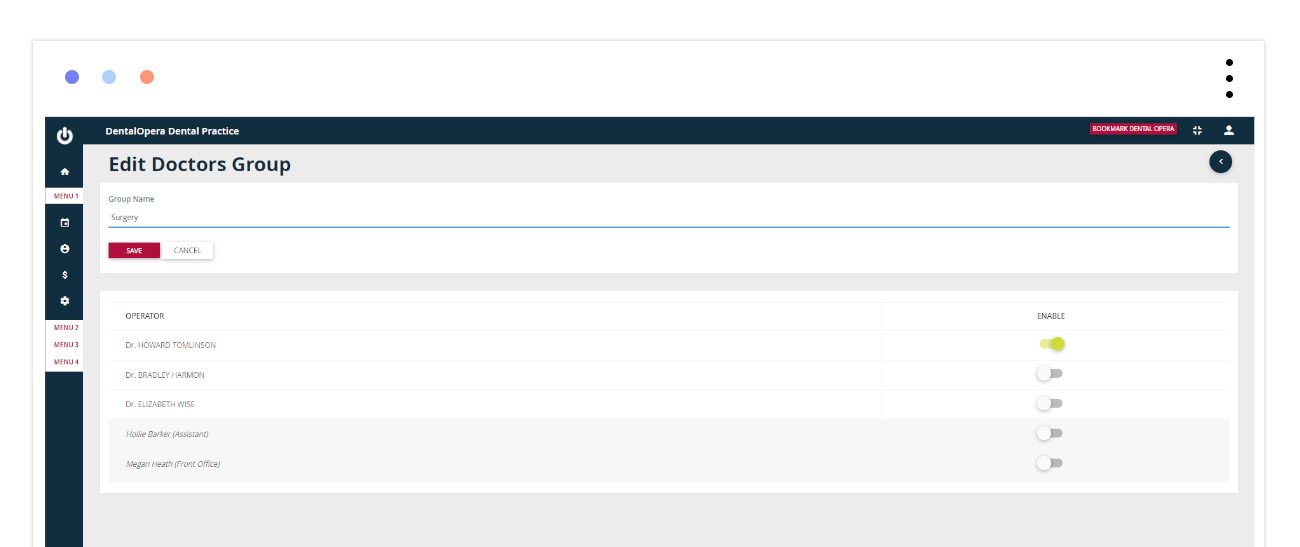
Once the working unit is created, proceed by enabling the operators you wish to register in the group of interest. Click on the PEN ICON next to the previously created working unit. In the graphic opening up, you will be able to find the list of all the entered DOCTORS. Just use the button ON-OFF (on the side of each DOCTORS name) to make your choice.


