Guide to the patient section
Let`s talk about the patient section. It contains the whole data, the details, the notes and the PROCEDURES concerning the individual patient.
Select PATIENTS from the curtain on the main menu of the DENTAL PRACTICE SOFTWARE DentalOpera. By selecting one patient from the accessible ones you will reach the private section of that respective patient.
This section is divided in 6 different tabs: PATIENT TAB, TREATMENT PLAN, ACCOUNTANCY, CLINICAL JOURNAL, ANAMNESIS and lastly the PERIODONTAL.
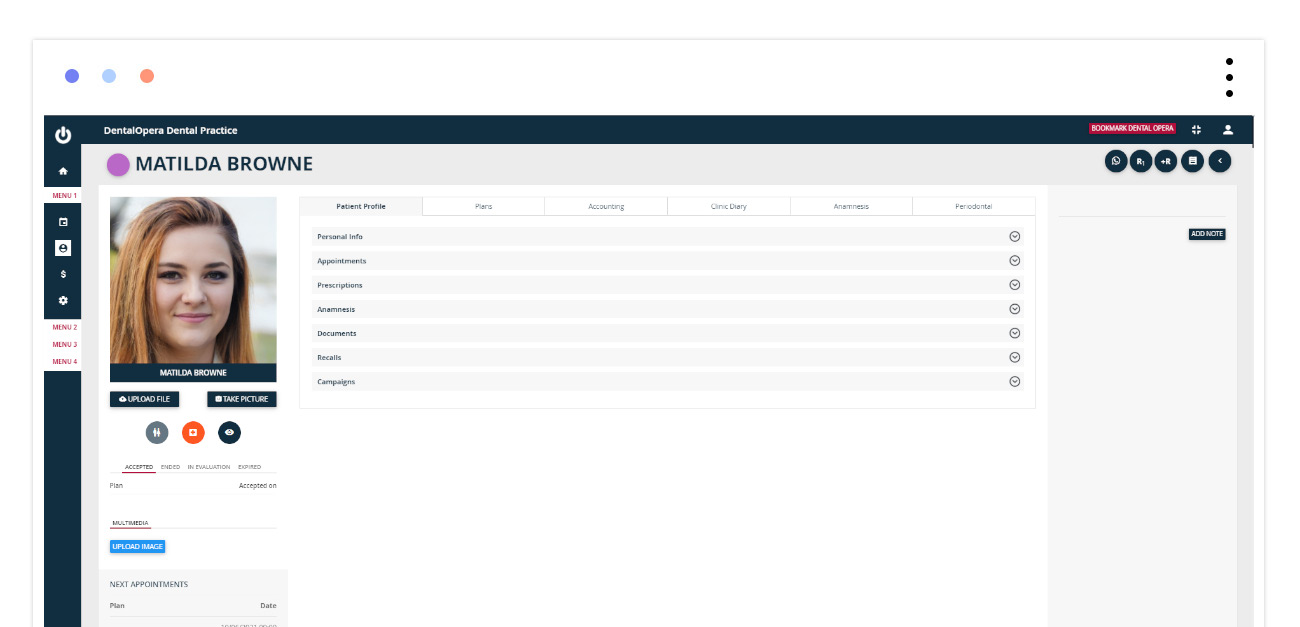
n this section you are going to find many buttons useful for the completion of the final picture, distinguishing each patient.
The two buttons on the left allow you to give your client a face, indeed, by clicking on UPLOAD FILE you can easily load a picture of your patient (saved on the computer). Another option is to press TAKE PICTURE and later TAKE;- an easy process requiring you to just use a device equipped with a webcam. Always remember to SAVE.
On the bottom there are 3 more buttons. Starting on the left, the first button helps you visualize if the selected patient has a familiar relationship with other patients. The second button allows a quick glance on your clients anamnesis and the third one shows some crucial information on your customer (like telephone number and age).
The buttons ACCEPTED, COMPLETED and UNDER EVALUATION aid you in the rapid visualization of your clients TREATMENT PLAN and its progress.
In the MULTIMEDIA section it is possible to insert images by clicking on the blue button UPLOAD IMAGE (for example panoramic x-rays)
On the right of the patient section you get the opportunity to enter a memo regarding your patient (perhaps on executed PROCEDURES) – just fill it out and push ADD MEMO.
The buttons on the top right are better explained in the article “how to manage recalls”. Therefore, it is recommended reading that chapter as well.
Now let`s get to the core of the patient section.
1 PATIENT TAB
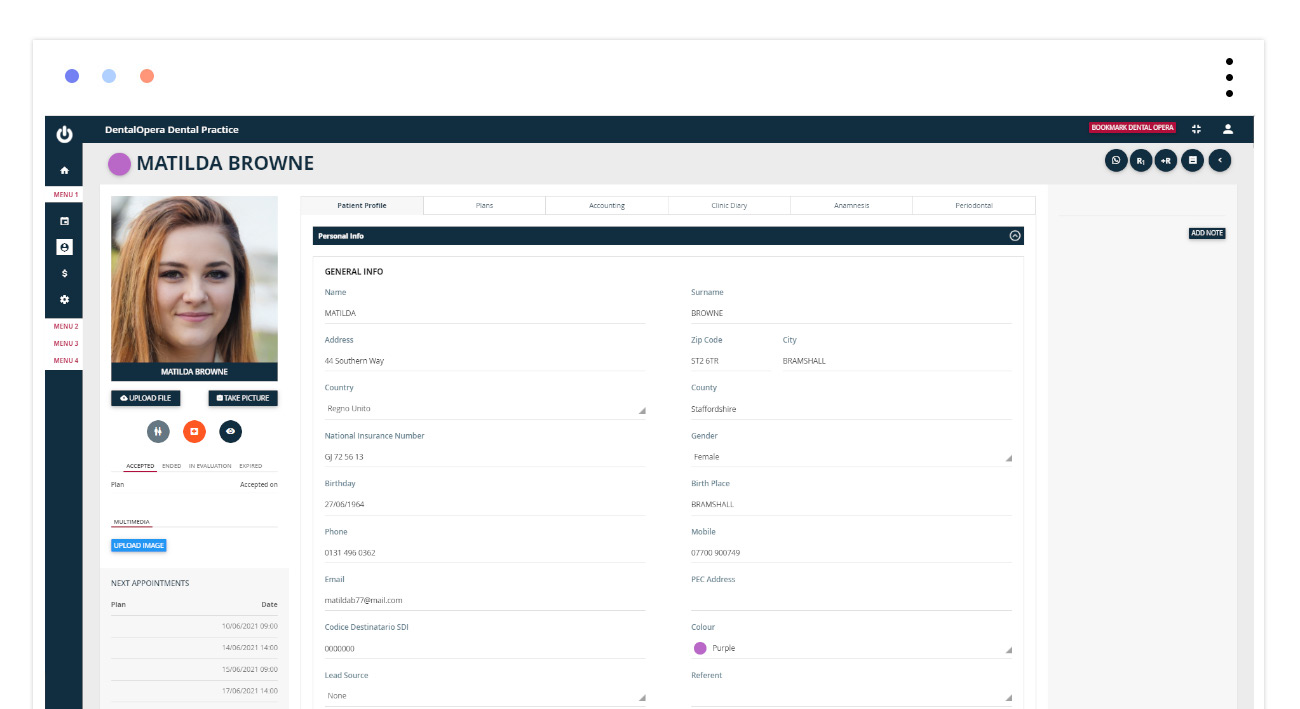
Inside the item PERSONAL DATA, you are able to complete the detailed description of the individual patient by sweeping between additional data, payers, family and the consents to the offered PROCEDURES of your practice. Remember to click on SAVE for each insertion or modification.
The items APPOINTMENT HISTORY, PRESCRIPTIONS, RECALLS and CAMPAIGN are only needed for a quick feedback of everything that has been dedicated to the client.
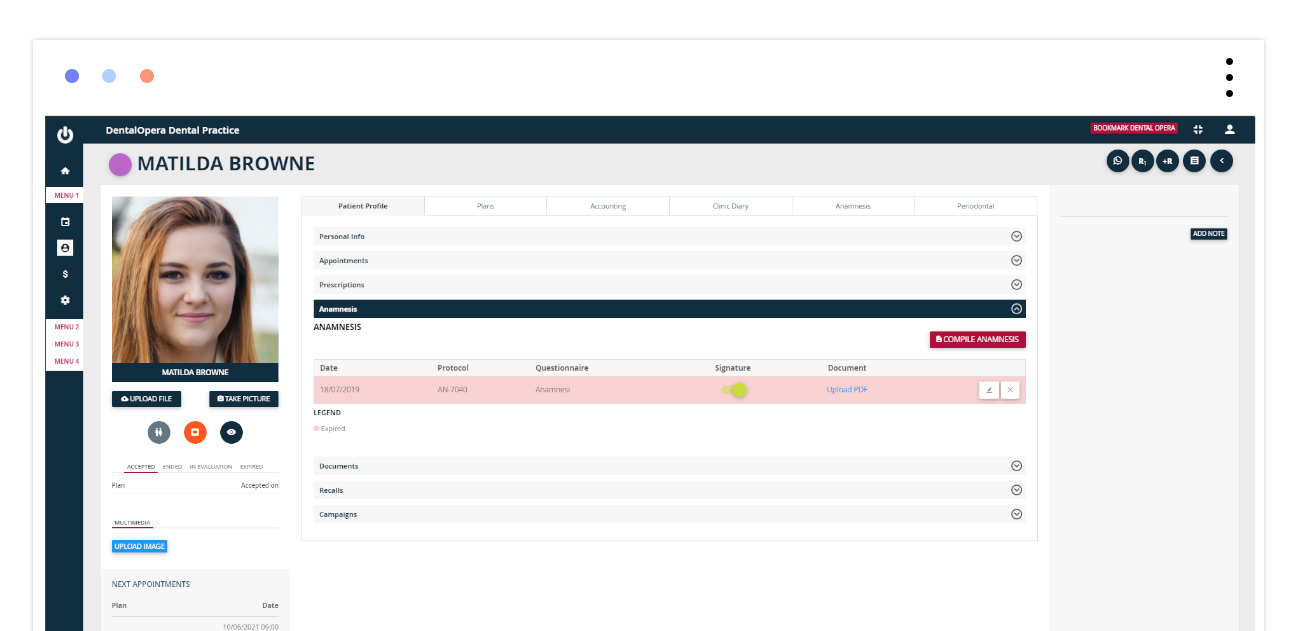
The item ANAMNESIS proves to be of great importance because it allows to insert the data of an already completed anamnesis in the platform.
After having printed the DOCUMENT OF ANAMNESIS and given it to the patient for completion and signature, click on the button COMPLETE ANAMNESIS. Then choose the type of document and after having correctly inserted all the data, click on SAVE. If the anamnesis was previously signed by the patient, you are able to notify that thanks to the ON-OFF button.
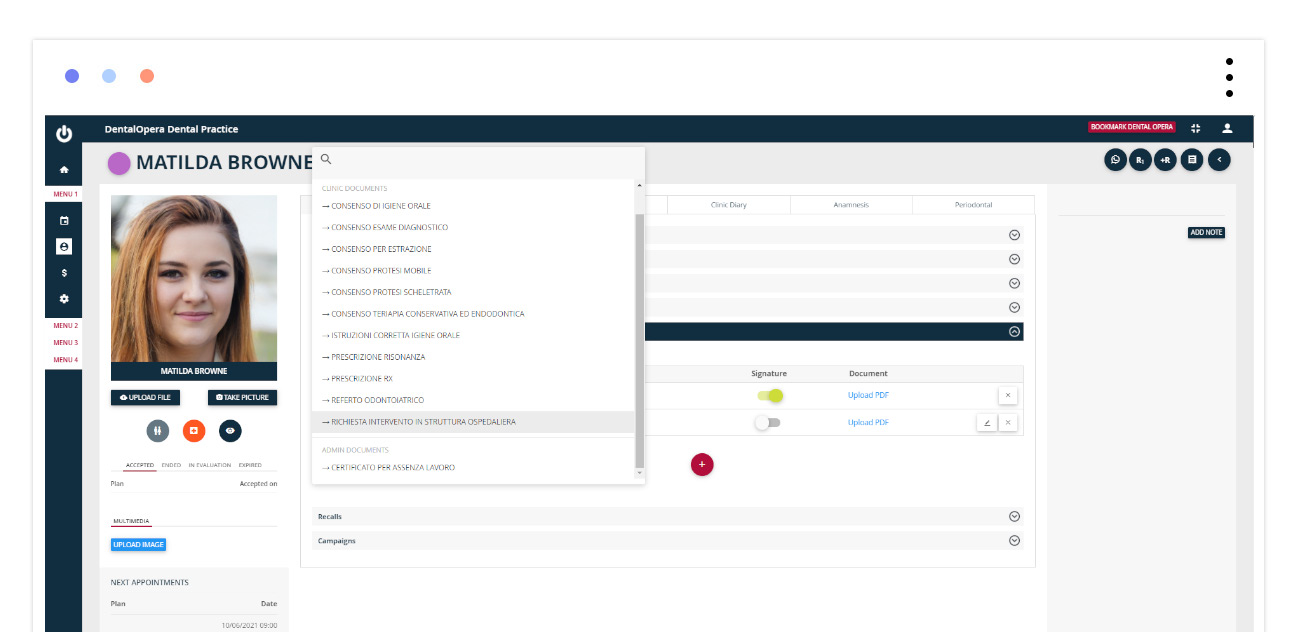
The item DOCUMENTS helps to insert a signed approval into the platform.
Choose the document you care to print from the drop-down menu and click the green button “+”;- a tab will open up, allowing you to modify the document data if necessary. At the end, click on SAVE. By clicking on the TITLE of the document (colored blue) a page will open up offering you the possibility to print the document, so that the patient can sign it.
The potential signature can be indicated with the ON-OFF button.
2 TREATMENT PLAN
The section where you can visualize and add new treatment plans for your patient.
It is recommended to read the article “setup treatment plan” for further information.
3 ACCOUNTANCY
In this section you can monitor all the money movements of your patient.
Every treatment plan represents a block of this section. If the block is colored red and blinks, the patient is behind with the payments of executed PROCEDURES. If the block is orange, the patient has made a deposit regarding an executed procedure. Lastly, a block colored green symbolizes a payment that equals the executed PROCEDURE.
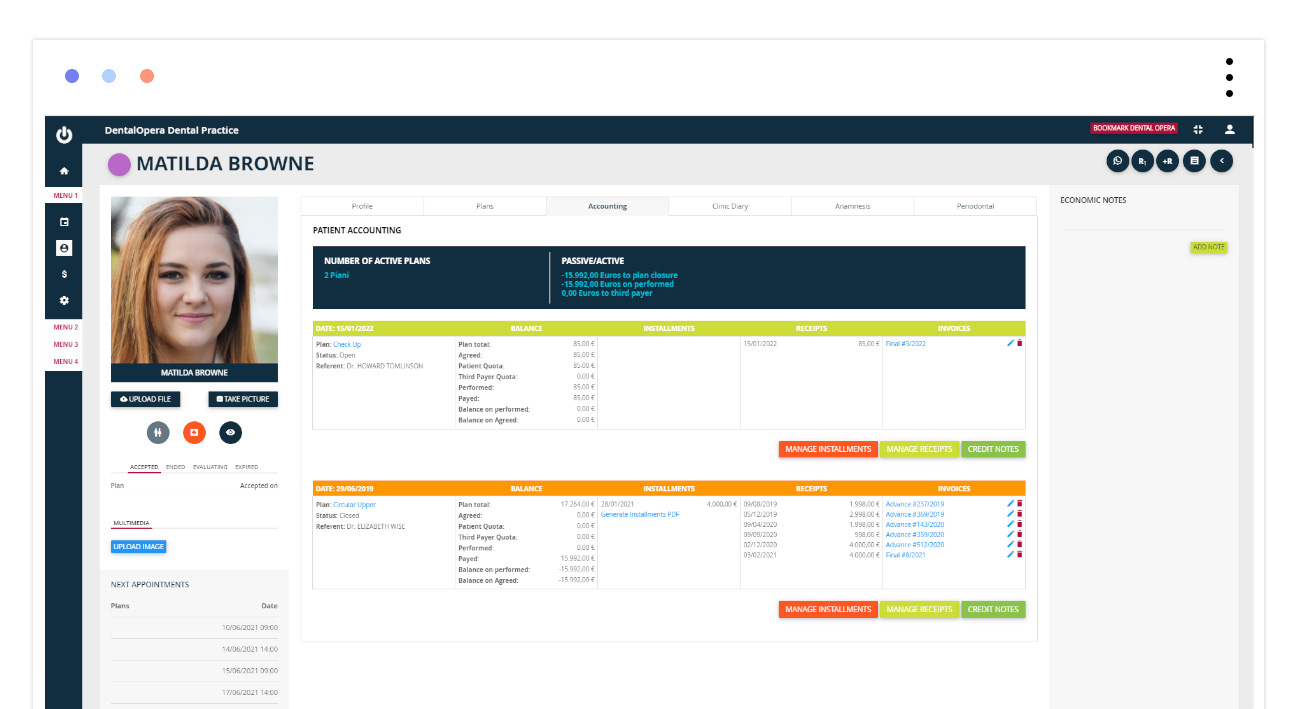
By clicking the button MANAGE EXPIRIES it is possible to enter expiry memos to present to your customer inside the respective block. Same thing applies to CREDIT NOTE and PRO FORMA.
By using the button MANAGE REVENUE, it is possible to insert eventual intakes coming from your patients in the respective block (communicating even the payment method).
Below the column invoices, you can create and optionally print different invoices depending on the state of payment.
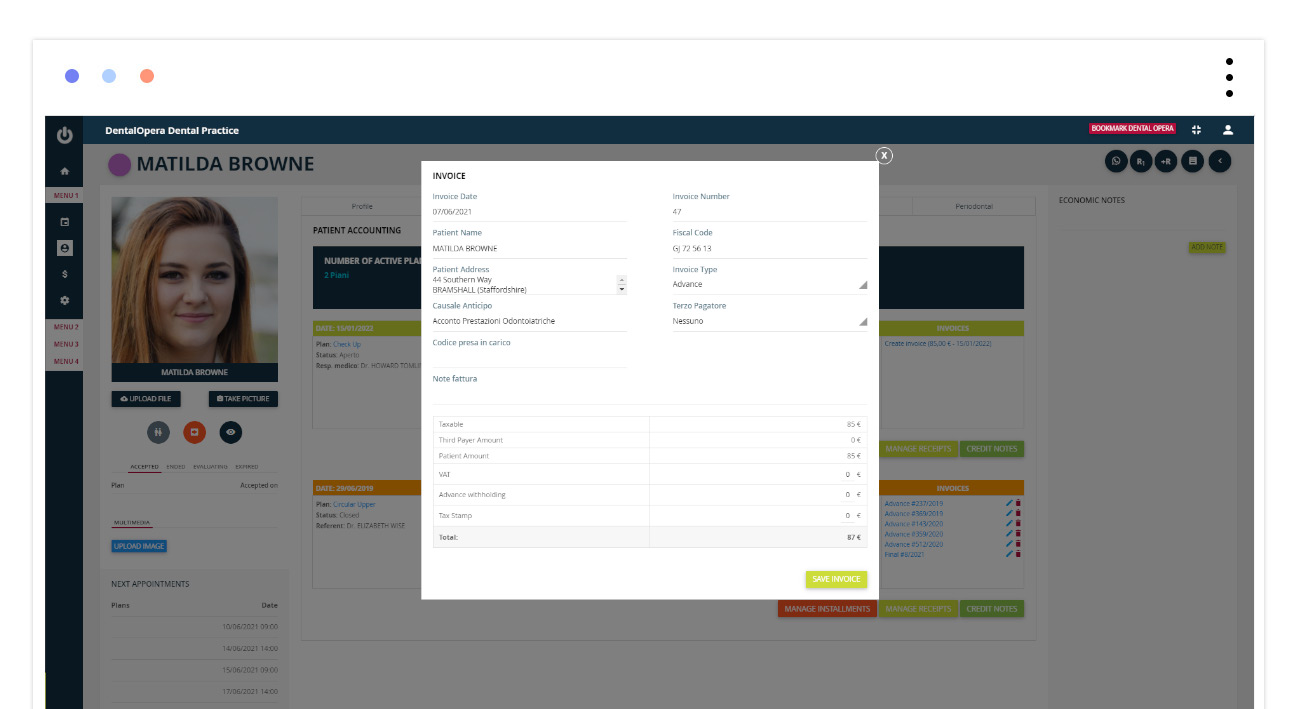
After having completed the necessary areas remember to save the invoice. If first the revenue was notified as a deposit, through this process it transformed into an actual bill. By clicking the colored TEXT a new page will open, designed for the purpose of printing.
4 CLINICAL JOURNAL
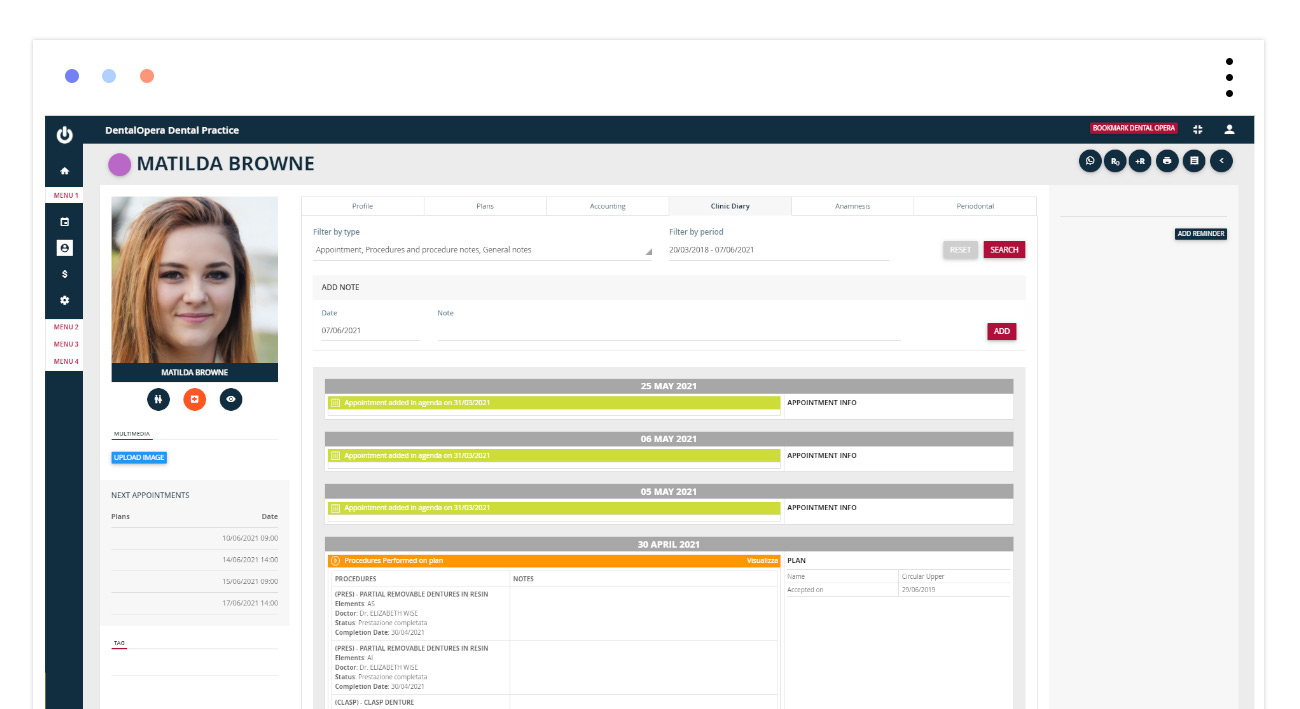
This section appears to be essential to keep track of every PROCEDURE bound to an appointment the client has met.
It keeps track of the arrival hours, the duration of the procedure and the leaving hours of the patients (and of possible absence of the patients). This feature obviously just works if hours and duration are previously setup in the TIMETABLE (thanks to the appointment status). In the area above, it is possible to setup various filters dedicated to search for certain appointments and PROCEDURES. Below, you find the button INSERT designed for the entering of possible notes.
5 ANAMNESIS
This tab allows you to visualize the collection of medical history that your client has completed and signed throughout his stay in your dental practice. In this section, however, no modifications can be applied.
.
6 PERIODONTAL
The section of the PERIODONTAL FOLDER is a tool of essential importance concerning the collection of data and information under the circumstance of a periodontal pathology: In this manner, you gain a complete picture of the periodontal condition of your patient and are able to more easily plan a focused and suitable therapeutic procedure. By completing the periodontal folder, collect a lot of information on your patient and on the characteristics of his pathology.
By scrolling down, notice the various options to perfectly outline and show the periodontal condition: missing teeth, tooth movements if present, an implant, furcation, dental plaque, gingival margin, quantity of bleeding and lastly the depth of dental probing. By using the left mouse key add a certain quantity and by clicking the right key remove certain quantities.
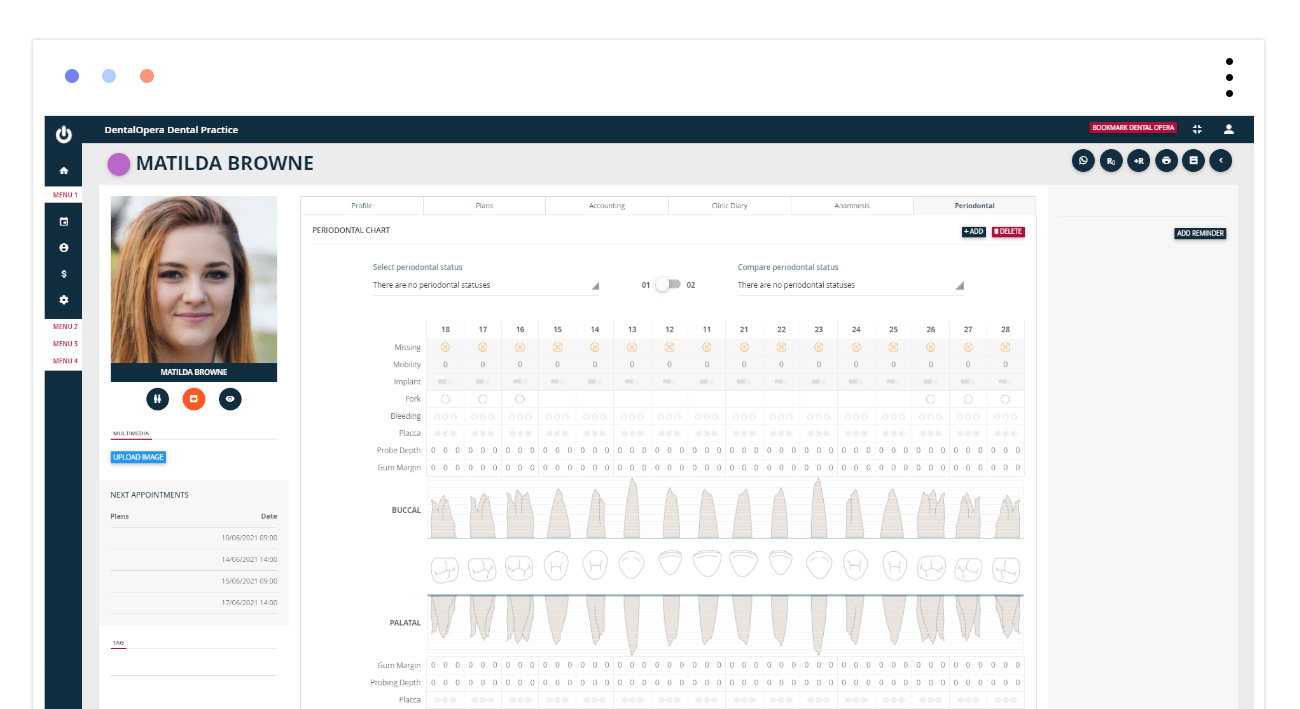
Like a few other tabs, the PERIODONTAL provides two filters to compare different PERIODONTAL CONDITIONS. These can be visualized and changed with the ON-OFF button.
To delete one of the periodontal conditions simply click on DELETE.


