Setup treatment plan
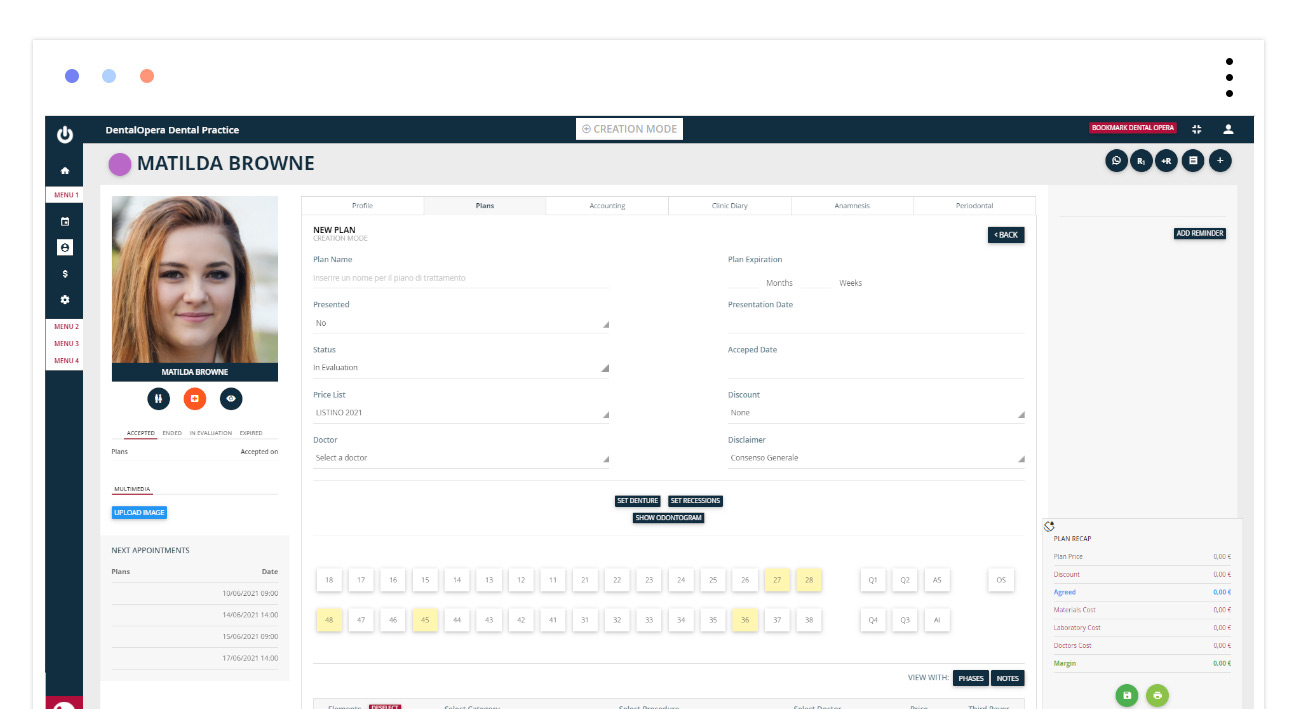
To continue with the incorporation of a treatment plan, select the desired patient from the section PATIENTS and open the tab TREATMENT PLAN.
Insert a new treatment plan by clicking on +NEW PATIENT on the top right of the tab.

Let`s begin with the development of our treatment plan. Start by entering the name of the plan, the selection of the accountable doctor, the selection of the print notes and even whether to apply a discount to the PROCEDURES (the discount can be selected from those already setup or it can be inserted manually in the section COMPLETE TREATMENT PLAN). To highlight the PROCEDURES which we enter in the quotation it is recommended, at least for the first tries, to make the Odontogramm visible. Therefore, click on SHOW ODONTOGRAMM. During the visit, it is going to be important to setup the dentition or the recessions prior to the compiling of a treatment plan. Just press the corresponding buttons above the Odontogramm.
Let`s go on with the setup of the dentition.

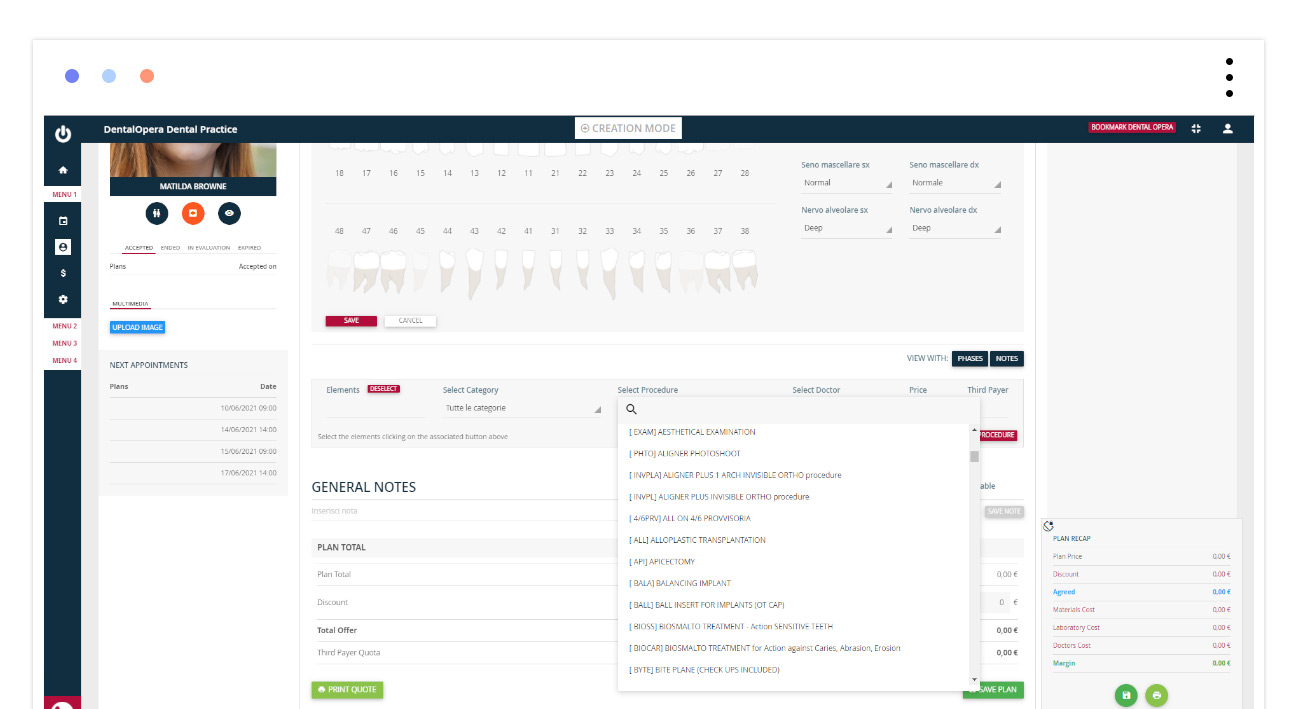
Click SETUP DENTITION. A screen will open from which it is possible to select the dentition via the dedicated area of selection. Individualize the graphic by characterizing the maxillary sinus and the alveolar nerves. In relation to the missing teeth: just click (1x) on the respective elements in the graphic. This way they will not be visible in the Odontogramm. Once you`ve setup the dentition, click on SAVE.
Now let`s proceed with the setup of the recessions.

Click on SETUP RECESSIONS on the screen dedicated to the treatment plan. You can select the entire quadrants or indicate a single area or more areas, by clicking on the ones that present recessions. At the end, press SAVE.
Now we are ready to setup a treatment plan that indicates the specific condition of the patient.
The treatment plans will be constructed according to the mouth area of each individual patient.
If you want to insert a PROCEDURE, you have the possibility to attach it to one tooth, or more teeth. Just click on the reference boxes below the Odontogramm.
- OS indicates PROCEDURES concerning the whole mouth (dental hygiene).
- SA and IA superior and inferior arch.
- Q1,2,3,4 represent the quadrants.
After having selected the type of PROCEDURE and the accountable doctor, click on ADD PROCEDURE.
It is important to remember, that for the insertion of multiple PROCEDURES on different teeth it is necessary to deselect the elements selected for the previous PROCEDURE (the green colored elements therefore need to get back to a neutral color).
Once the insertion of all PROCEDURES for the treatment plan is terminated click on the dark green button SAVE TREATMENT PLAN.
If you want to print it and show it to your client: press the green button with the printer symbol. It is possible to choose if you would like to include the Odontogramm or not. Just click on WITHOUT ODONTOGRAMM or WITH ODONTOGRAMM.


